When dealing with sensitive student information, there may be times that you want to print a document and make sure that other students don't see the content. Other times you may want to print a document on special paper. You may go load the paper, and by the time you get back to your computer and hit print, someone else has sent a job through and used your paper. In these types of cases, using a feature called "Secure Printing" can come in really handy. All of the Lexmark printers in our building have this capability. Here's an example of using it:
1. In a completed Word document, click File ta the top, then Print. In the Print dialog, ensure you've selected the correct printer from the drop down box and click on "Printer Properties."
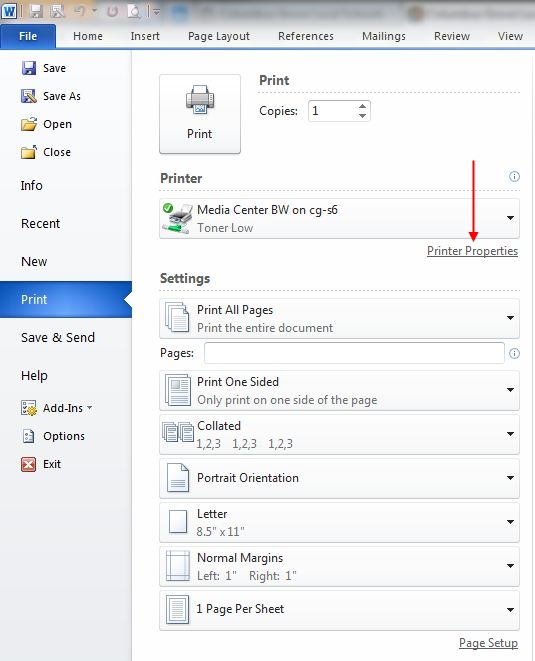
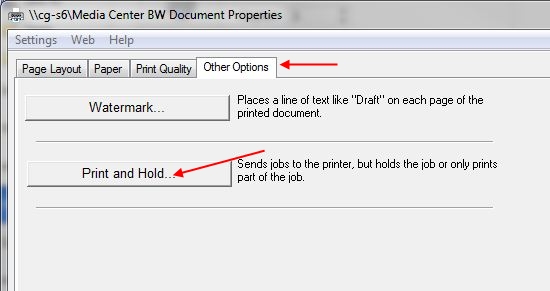
2. In the box that comes up, click on the "Other Options" tab at the top.
3. Click on the "Print and Hold" button.
4. Click on "Confidential." Leave your default username in there and enter a PIN in the second box.
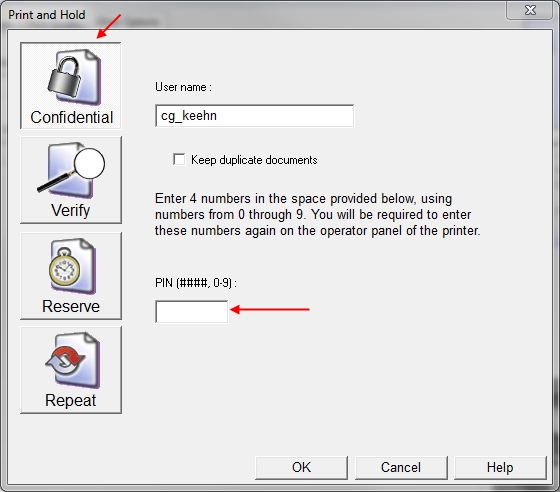
5. Click OK twice, and you're ready to Print. After clicking Print and going to the printer, you'll see the following screen. Using the arrows on the printer, go down to "Held Jobs" and press the check button.
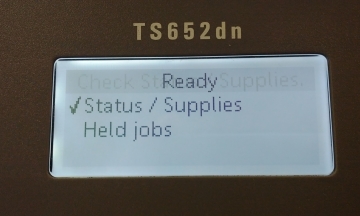
6. Arrow down to your username and press the check button again.
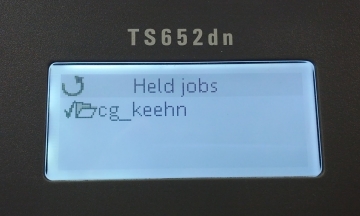
7. "Confidential Jobs" is highlighted. Press the check button again.
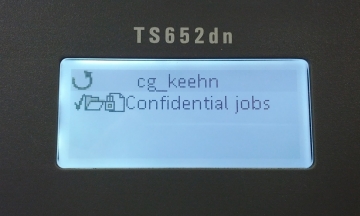
8. Enter the PIN you selected at your computer and press the check button again.
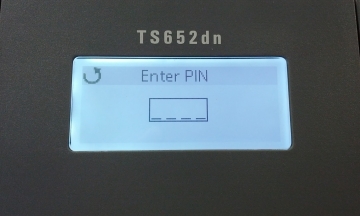
9. Select the document you want to print using the arrow keys and press the check button.
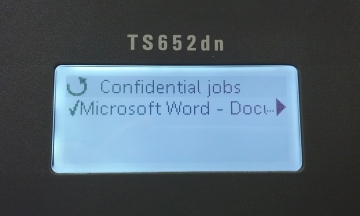
10. Select "Print one Copy" or "Print Copies" and press the check button to print.
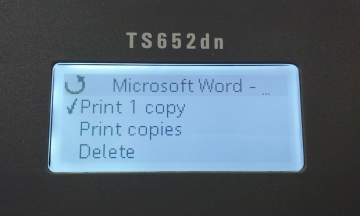
Jobs will automatically expire after 24 hours, or you can go through the menu and select the "Delete" option from the last screen to remove it.
